SP111-41(L) Custom Profile Template
This topic describes how to create a custom Profile template for SP111-41(L).
Background information
A Profile template contains both Basic Settings and Advanced Settings. Basic settings can edited with the visual interface provided by Milesight Development Platform, while the advanced settings can ONLY be edited in JSON format.
Follow the workflow below to create and apply a custom Profile template:
- Create a custom Profile template on Milesight Development Platform.
- Configure the basic settings with the visual interface.
- Configure the advanced settings in the JSON format.
- Save and apply the custom Profile template accordingly.
Step 1. Create a custom Profile template
- Log in to Milesight Development Platform.
- On the top bar, click Resource,
then select the My Config
tab.

- Click Add.
- In the Basic Configuration section, configure the
basic information:

- In the Config Template Name field, specify a name to help you identify this template.
- In the Select Product Config Template field, search and select SP111-41(L)_Profile_Template.
- In the Config Template Version drop-down list, select the version of the Profile template.
Step 2. Configure the connecting platform
- Select the Generic Configuration tab.
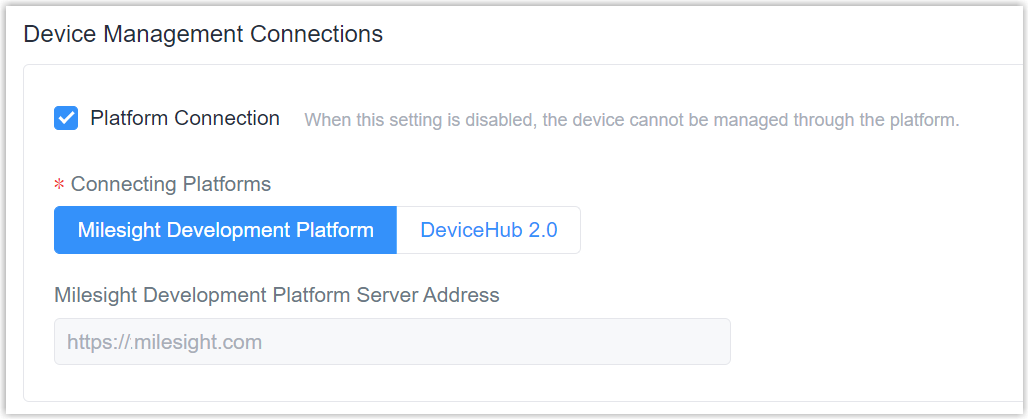
- In the Device Management Connections section, decide
whether to connect the device to Milesight platform for remote management
and configuration.
- Connect the device to Milesight Development Platform
- Retain the default settings.

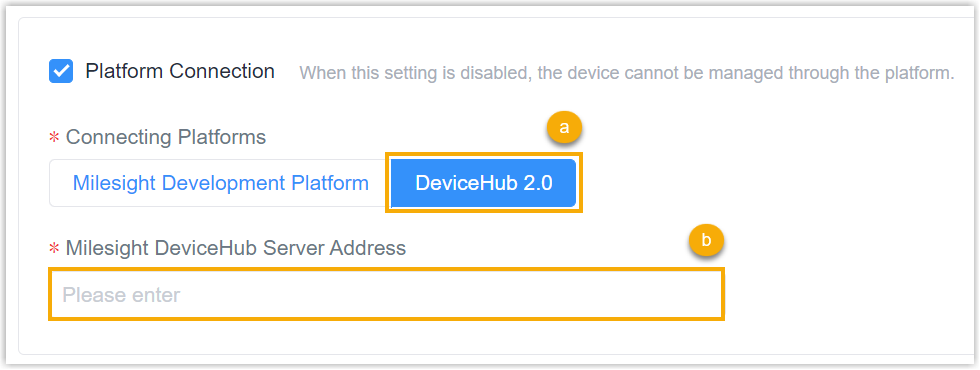
- Connect the device to Milesight DeviceHub

- In the Connecting Platforms field, select DeviceHub 2.0.
- In the Milesight DeviceHub Server Address field, enter the server address of the Milesight DeviceHub.
- Do NOT connect to Milesight platform
- Uncheck the Platform Connection.

Step 3. Configure the system settings
- Select the Basic Configuration tab, then go to the
System section.

- In the Device Name field, specify a name to help you identify this device.
- In the Time Zone drop-down list, select the desired time zone for this device.
- In the Daylight Saving Time field, decide whether to
enable Daylight Saving Time (DST) for this device.
- Disable: Disable DST for this device.
- Automatic: Enable DST for this device.
- In the Wake Up Method section, specify the method to wake up the device from sleep mode.
Step 4. Configure the Video settings
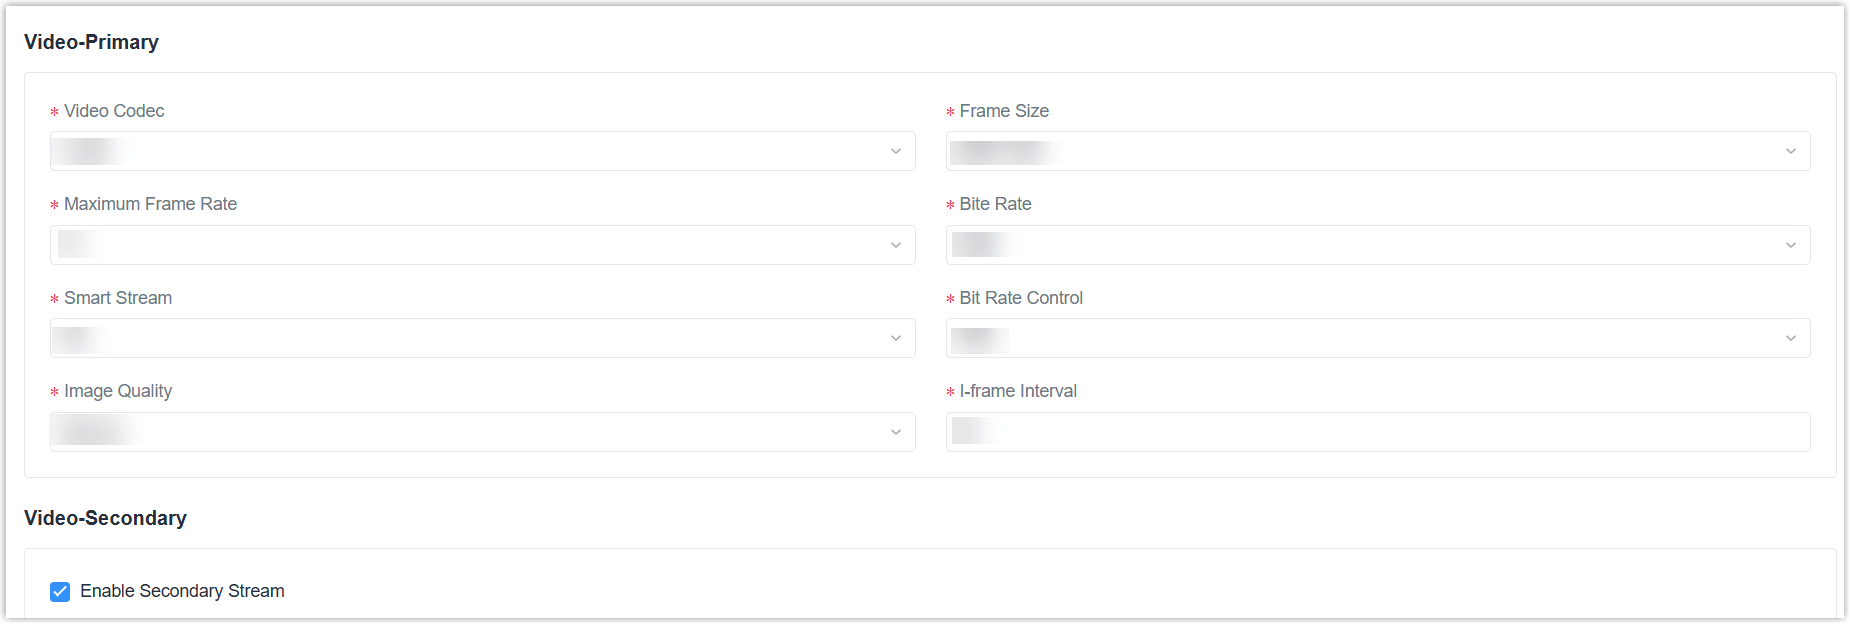
- Go to the Video section to configure video
settings.

Setting Description Enable Secondary Stream Click the check box to activate the secondary stream as required. Video Codec Specify the video codec type.
Frame Size Specify the frame size of video. Maximum Frame Rate Specify the maximum refresh rate per second. Bite Rate Specify the transmitting bits of data per second. The higher value corresponds to the higher video quality, and the higher bandwidth is required as well. Smart Stream Turn On or Off Smart Stream mode. Smart Stream mode remarkably reduces the bandwidth and the data storage requirements for network cameras while ensuring the high quality of images, and it is a 10-level adjustable codec. Bit Rate Control CBR: Constant Bitrate. The rate of CBR output is constant. VBR: Variable Bitrate. VBR files vary the amount of output data per time segment.
Image Quality Specify the image quality and it is only if you select VBR. I-frame Interval Set the I-frame interval to 1~120. The number must be a multiple of the number of frames.
Step 5. Configure Image settings
- In the Image section, configure the image settings.

Setting Description Power Line Frequency Select the power line frequency. Enable Privacy Mask Enable to cover certain areas on the live video to prevent certain spots in the surveillance area from being viewed and recorded. It supports to select the color of privacy masks.
Step 6. Configure OSD settings
- Go to the OSD section to configure the OSD
parameters.

Setting Description Font Size Select the font size for title and date. Font Color-R Specify the RGB values of font color.
Font Color-G Font Color-B Enable Background Color Enable to set different colors for display information background on screen. Background Color-R Specify the RGB values of background color. Background Color-G Background Color-B Show Video Title Check the check box to show video title. Video Title Specify the video title OSD content. Text Position Select the OSD display position on the image. Show Timestamp Check the check box to display date on the image. Date Position Select the date display position on the image. Date Format Select the date display format. Show Data Usage This Month Check the check box to show data usage on the image. Show Signal Strength Check the check box to show cellular signal strength on the image. Show Battery Level Check the check box to show battery level on the image. Signal & Battery Position Select the OSD display position on the image.
Step 7. Configure the Network settings
- In the Network section,
configure the network settings.

Setting Description Cellular Ping IP Address The device will send ICMP packet to this server address to determine whether the Internet connection is still available or not.
Enable Platform Address Platform access can be enabled to configure the external IP address and port of the backend VMS server.
Enable Email Enable or disable the device to send alarm video files via Emails. Email User Name: The sender's name. It is usually the same as the account name.
Email Sender Email Address: Email address to send video files attached emails.
Email Password: The password of the sender.
Email Server: The email server IP address or host name.
Email Port: The default TCP/IP port for SMTP IS 25 (not secured). For SSL/TLS port, it depends on the mail you use.
Email Recipient Email Address: Email address to receive video files.
Email Encryption: Select SSL or TLS if it is required by the SMTP server.
FTP Server Address Specify the FTP or SFTP server address. FTP Server Port Specify the FTP or SFTP server port. FTP User Name Specify the user name to login to the FTP/SFTP server.
FTP Password Specify the password to login to the FTP/SFTP server.
Enable VPN Enable VPN feature to remote access the camera. - In the Enable VPN section, select VPN Mode and
configure the VPN settings to remote access the camera.

Setting Description Milesight VPN Server Address Specify the server address of Milesight VPN server.
Server Port Specify the server port of Milesight VPN server.
Authorization Code Copy the authentication code from Milesight VPN server. Device Name Customize a unique device name to define the device. General VPN OpenVPN Configuration File Upload the .ovpn format OpenVPN client configuration file. Wireguard VPN Configuration File Upload Wireguard VPN configuration file.
Step 8. Save the custom Profile template
- On the left-bottom of the page, click Save.
- Apply the custom Profile template according to the operation method.
- Web page: Select the Profile template when adding devices.
- API: Do as follow:
- In the Operation column, click
 to download the Profile in
JSON.
- Include the entire JSON in the API request of Create Configuration Tasks.
- In the Operation column, click