SC211 Custom Profile Template
This topic describes how to create a custom Profile template for SC211.
Background information
A Profile template contains both Basic Settings and Advanced Settings. Basic settings can edited with the visual interface provided by Milesight Development Platform, while the advanced settings can ONLY be edited in JSON format.
Follow the workflow below to create and apply a custom Profile template:
- Create a custom Profile template on Milesight Development Platform.
- Configure the basic settings with the visual interface.
- Configure the advanced settings in the JSON format.
- Save and apply the custom Profile template accordingly.
Step 1. Create a custom Profile template
- Log in to Milesight Development Platform.
- On the top bar, click Resource,
then select the My Config
tab.

- Click Add.
- In the Basic Configuration section, configure the
basic information:

- In the Config Template Name field, specify a name to help you identify this template.
- In the Select Product Config Template field, search and select SC211_Profile_Template.
- In the Config Template Version drop-down list, select the version of the Profile template.
Step 2. Configure the connecting platform
- Select the Generic Configuration tab.
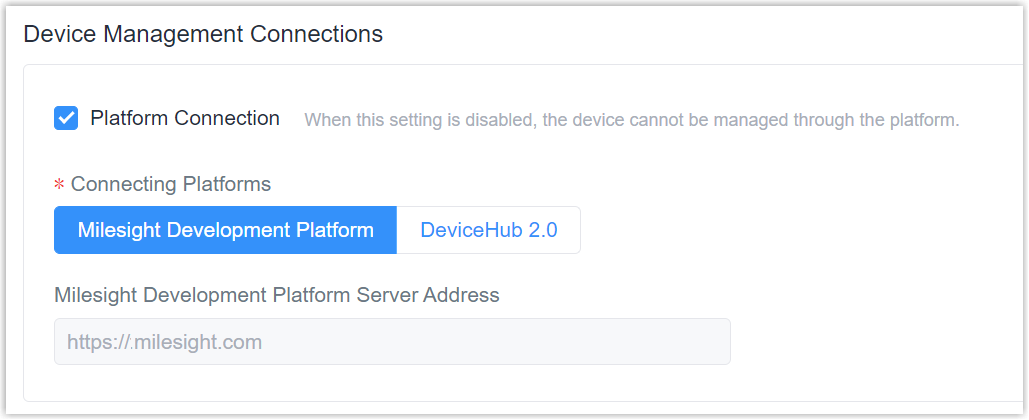
- In the Device Management Connections section, decide
whether to connect the device to Milesight platform for remote management
and configuration.
- Connect the device to Milesight Development Platform
- Retain the default settings.

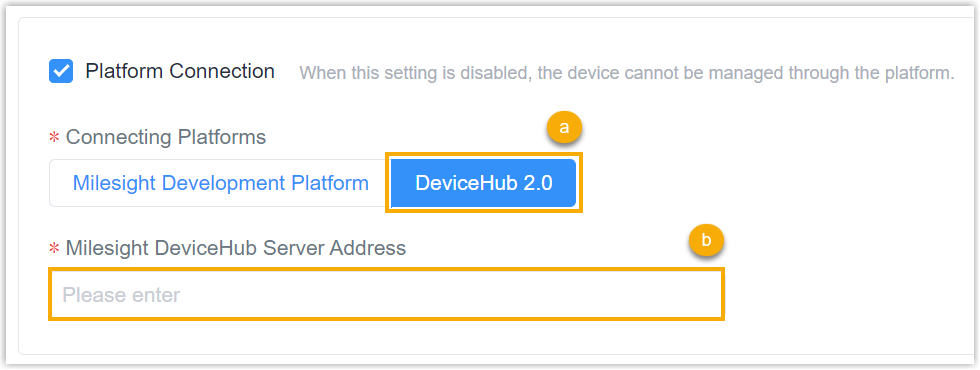
- Connect the device to Milesight DeviceHub

- In the Connecting Platforms field, select DeviceHub 2.0.
- In the Milesight DeviceHub Server Address field, enter the server address of the Milesight DeviceHub.
- Do NOT connect to Milesight platform
- Uncheck the Platform Connection.

Step 3. Configure the system settings
- Select the Basic Configuration tab, then go to the
System section.

- In the Device Name field, specify a name to help you identify this device.
- In the Time Zone drop-down list, select the desired time zone for this device.
- In the Daylight Saving Time field, decide whether to
enable Daylight Saving Time (DST) for this device.
- Disable: Disable DST for this device.
- Automatic: Enable DST for this device.
- In the Time Synchronize Mode section, specify the
time synchronization mode.
- Manual: Manually synchronize the device's time.
- NTP Timing: Synchronize the device's time across a network using the Network Time Protocol.
- In the SSH field, decide whether to enable SSH service for this device.
- In the Wake Up Method section, specify the method to wake up the device from sleep mode.
- In the Data Report Takeover field, decide whether to enable to report data to Milesight Development Platform.
Step 4. Configure the Image settings
- Go to the Image Configuration section to configure
image settings.

Setting Description Brightness Adjust the Brightness of the scene.
Contrast Adjust the color and light contrast. Saturation Adjust the Saturation of the image. Higher Saturation makes colors appear more "pure" while lower one appears more “wash-out”. Sharpness Adjust the Sharpness of image. Higher Sharpness sharps the pixel boundary and makes the image looks “more clear”. 2D DNR Adjust the noise reduction level. Day/Night Switch Mode Night: Shown in live view based on Night Mode settings. Day: Shown in live view based on Day Mode settings.
Auto: Shown in live view based on environment, set the sensitivity value for switching Day Mode to Night Mode, or Night Mode to Day Mode.Schedule: Switch day and night according to the configured schedule.
IR LED Level Adjust the strength of the IR LED, the range is from 0 to 100. Image Timestamp OSD Display timestamp OSD on the image. Image Dev. Name OSD Display device name OSD on the image. Maximum Shutter Maximum value for configuring the exposure time of night mode images.
Maximum Gain Level Maximum value for configuring the gain of night mode images.
Step 5. Configure Capture settings
- Go to the Capture Management section.

- Configure the capture parameters.
Setting Description Image Resolution Select the resolution of the captured images. Image Type Select the captured image type.
Full Image: It will capture the full image when an object is detected.
Cropping Region: The captured image will be cropped according to your settings when an object is detected.
AI Confidence Set the AI confidence value for trigger capture. Sensor Sensitivity Set radar sensor sensitivity. The higher the sensitivity, the easier the object is to be detected. Minimum Detection Speed Targets with a speed greater than this set value will trigger the capture. Maximum Detection Speed Image capture will be triggered when the target speed falls below this preset value. A null value indicates no effect. Sleep Delay This value represents the duration of time after which the device enters sleep mode when no target is detected. To avoid missed detections at lower target speeds, it is recommended to configure a larger value for this setting. Capture Interval In scenarios where the target moves slowly, setting a longer capture interval can prevent frequent triggering of captures for the same target. Enable Post Capture Decide whether to enable snapshot uploading. Post Capture Number Set the number to post the capture everytime. Post Capture Interval Set the interval to post the capture. This value should be set greater than the Capture Interval. Indicator Light Decide whether to enable to turn on the indicator light when the capture is triggered. Trigger Disable Time Period Set the time period to disable the trigger capture. One device can set 10 time periods at most. Continuous Capture Decide whether to enable continuous capture, and set the capture interval.
Step 6. Configure the Snapshot Post settings
- In the Post Management section, configure the snapshot post
settings.

Setting Description Snapshots Upload Mode Timing In this mode, it will upload the captured images at the interval you set. Upload Frequency: et the upload frequency to Once a Day or Twice a Day.
Upload Time: Set the time to upload the snapshots every day according to the set frequency.
Note: The timing mode can work normally only when the SD card is inserted.Immediacy In this mode, the captured images will only be uploaded when the device detects an object and triggers the capture.
Step 7. Configure the Network settings
- In the Cellular section,
configure the cellular settings.

Setting Description APN Specify the Access Point Name for cellular dial-up connection provided by local ISP. Please contact cellular operator or search for the Internet to get it.
Username Specify the username for cellular dial-up connection provided by local ISP.
Password Specify the password for cellular dial-up connection provided by local ISP. PIN Code Specify a 4-8 characters PIN code to unlock the SIM. Authentication Type Select the Authentication Type. None, PAP, CHAP, PAP and CHAP are optional.
Network Type Select from “Auto”, “4G Only”, and “3G Only”.
Ping Detection Enable or disable to send ICMP packet to determine whether the Internet connection is still available or not.
IP Address The device will send ICMP packet to this server address to determine whether the Internet connection is still available or not.
MTU The number of times the device will retry sending a ping request until determining that the connection has failed. (Unit: s)
Billing Day Select the date for clearing the data each month, and the system will clear the data on the date you set each month. - In the Enable WLAN section, configure the WLAN AP
settings for local web access and configuration.

Setting Description Radio Type Select the radio type for Wi-Fi connection.
Bandwidth Select the bandwidth for Wi-Fi connection. Channel Select the channel for Wi-Fi connection. Encryption Mode Select the encryption mode for Wi-Fi connection.
Step 8. Save the custom Profile template
- On the left-bottom of the page, click Save.
- Apply the custom Profile template according to the operation method.
- Web page: Select the Profile template when adding devices.
- API: Do as follow:
- In the Operation column, click
 to download the Profile in
JSON.
- Include the entire JSON in the API request of Add a Device.
- In the Operation column, click