8.4.2.1 Region Entrance
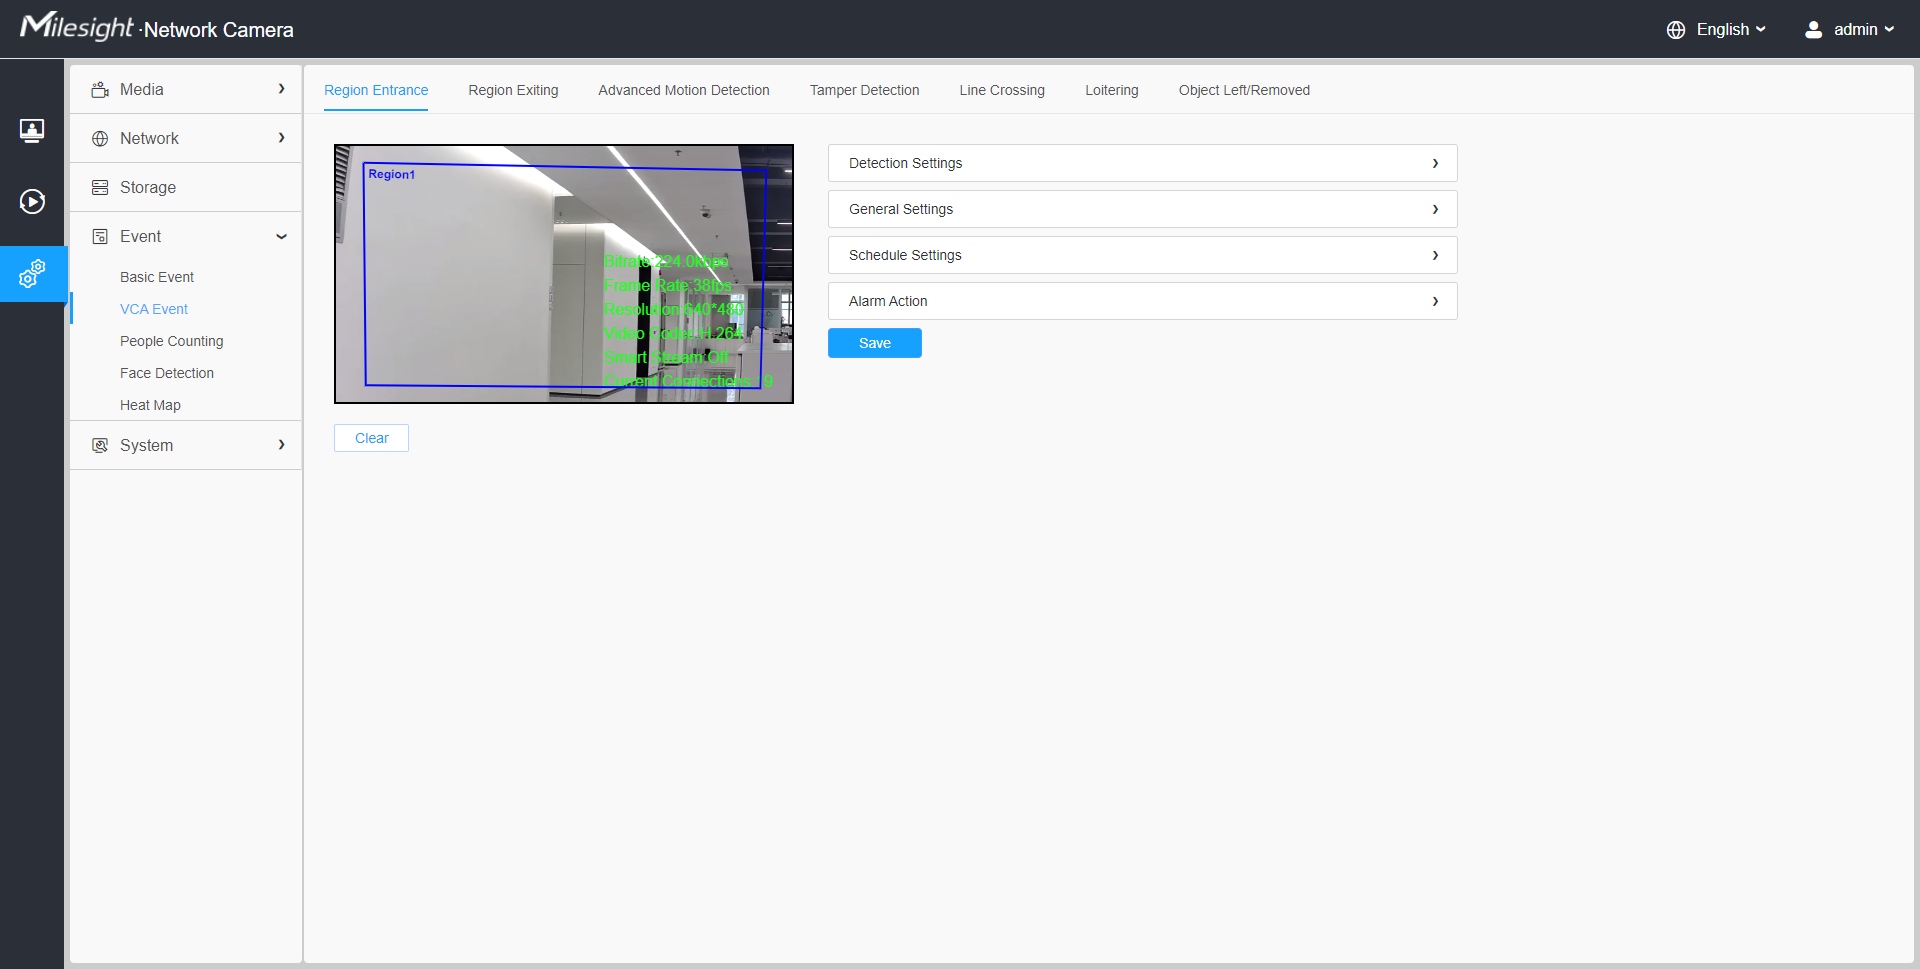
Region entrance helps to protect a special area from potential threat of suspicious person’s or object’s entrance. An alarm will be triggered when objects enter the selected regions by enabling region entrance.

Settings steps are shown as follows:
[Detection Settings]
Step1: Selected detection region and enable region entrance detection;
Step2: Choose detection object. Check Human or Vehicle attribute, and the camera will alarm once detecting people or vehicle and triggering related events;

[General Settings]
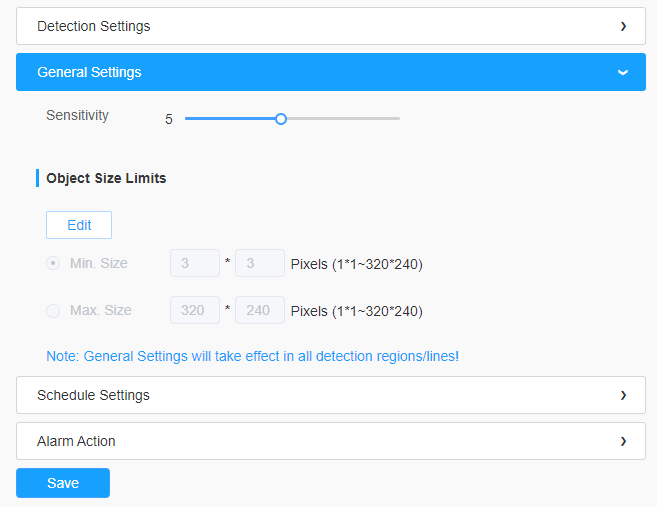
Step3: Set detecting sensitivity and object size limits;

| Parameters | Function Introduction |
|---|---|
| Sensitivity | Level 1~10 are available, the default level is 5. The higher the sensitivity, the easier it is for moving objects to be recorded in the results. |
| Min. Size | Draw the screen or input pixel number to set the minimum size of the detected object. When the object is smaller than this size, it will not be detected. The default minimum size is 3*3. |
| Max. Size | Draw the screen or input pixel number to set the maximum size of the detected object. When the object is larger than this size, it will not be detected. The default maximum size is 320*240. |
[Schedule Settings]
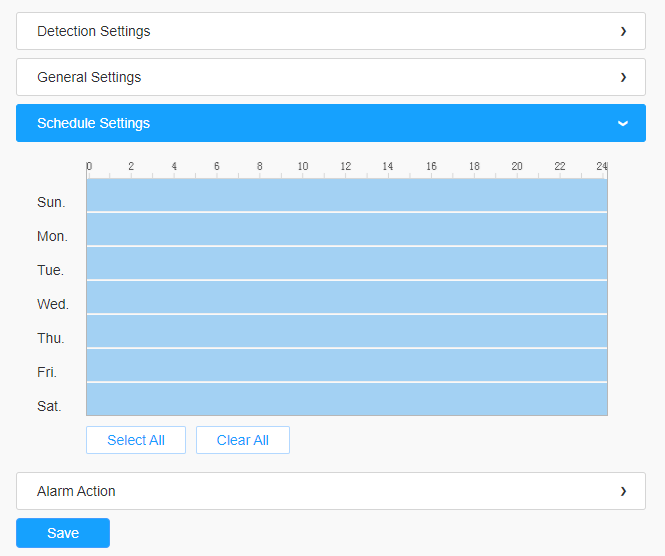
Step4: Set detection schedule;

| Parameters | Function Introduction |
|---|---|
| Copy the schedule area to another date. | |
|
Select all schedule. |
|
| Clear all schedule. |
[Alarm Action]
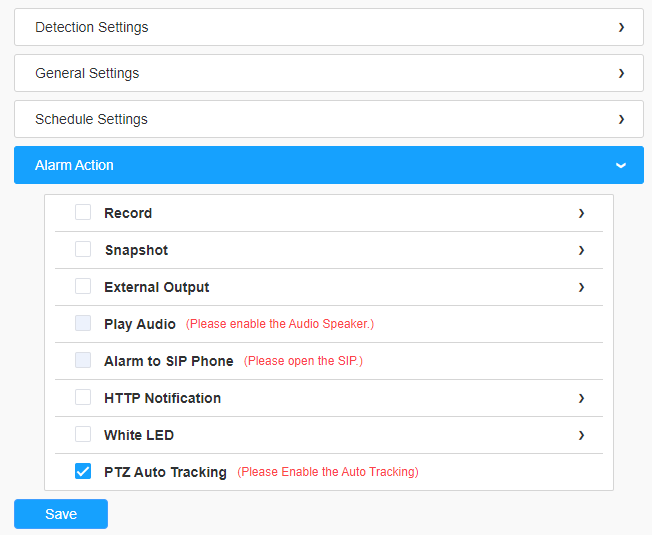
Step5: Set alarm action;

| Parameters | Function Introduction |
|---|---|
| Record | Duration: Selected the duration time of alarm.
5s/10s/15s/20s/25s/30s are available. Linkage: Save alarm recording files into SD Card or NAS or Upload the recording files via FTP. |
| Snapshot | Number: The number of snapshot, 1~5 are
available. Interval: This cannot be edited unless you choose more than 1 to Snapshot. Linkage: Save alarm recording files into SD Card or NAS, Upload the recording files via FTP and send alarm email. |
| External Output | If the camera equips with External Output, you can enable the action after configuring the trigger duration. |
| Play Audio |
Auto/10 seconds/30 seconds/1 minute/5 minutes/10 minutes are available. Note: Please enable the Audio Speaker.
|
| Alarm to SIP Phone | Support to call the SIP phone after enabling the SIP function.
Note: Please open the SIP. |
| HTTP Notification | Support to pop up the alarm news to specified HTTP URL. |
| White LED | When the alarm triggered, White LED will turn on to warning the
detected objects. Note: Only for PTZ Bullet. |
| PTZ Motion (Only for Advanced Motion Detection) |
When the motion alarm triggered, PTZ Motion allows the camera to
move the lens to the motion triggered position and zoom in.
Note: Only for PTZ series. |
| PTZ Auto Tracking | Camera will automatically track objects and trigger an alarm if
objects enter the selected regions. Note:
|