 This guide will explain how to collect data and send command to an UC3x with AWS IoT Core.
Download PDF: How to control UC3x with AWS IoT
Introduction
AWS IoT provides secure, bi-directional communication between Internet-connected devices such as sensors, actuators, embedded micro-controllers, or smart appliances and the AWS Cloud.
Requirements:- A UC3x device with a SIM card registered
- An AWS account
- Toolbox 5.12 or later
AWS IoT Core is a managed cloud platform that allows connected devices to easily and securely interact with cloud applications and other devices. Before we get started, please make sure Milesight UC3x Controller is able to visit the Internet with a SIM card registered.
Step 1: Update Toolbox to the latest version 5.12 or later.
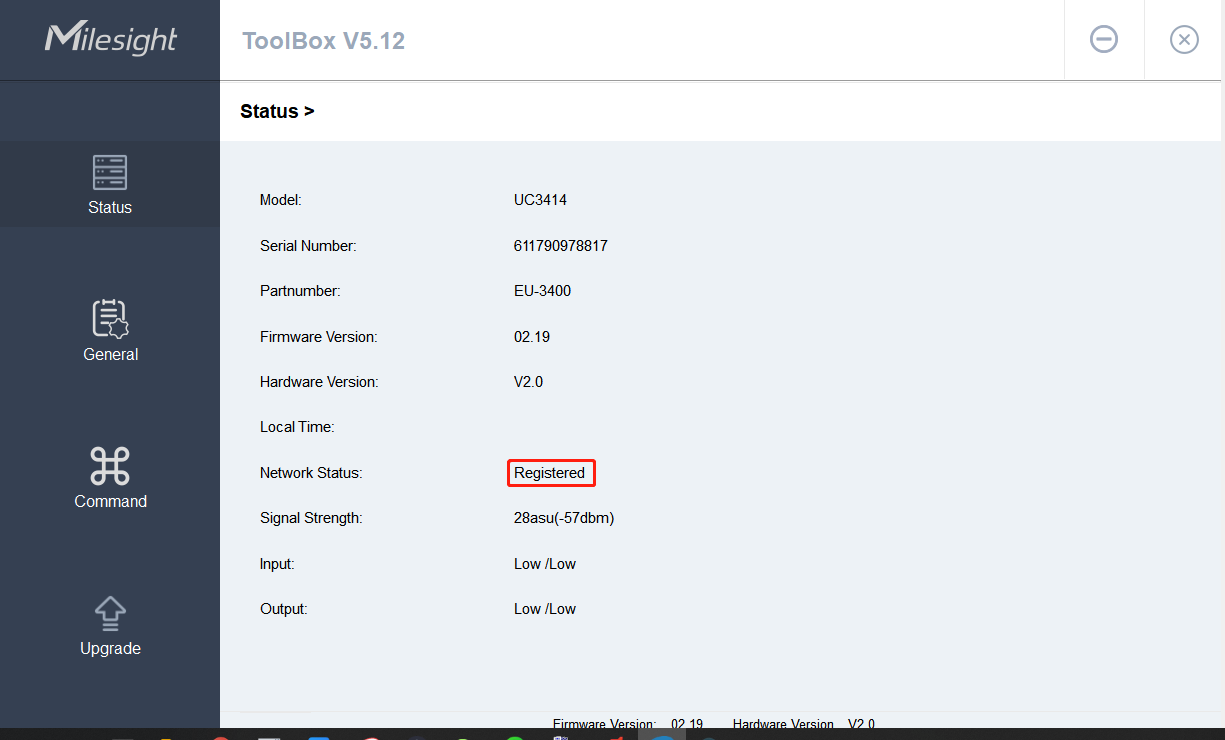
Step 2: Connect UC3x device to PC via USB cable and check the status of the device and import certificates in Toolbox.
Note: If UC3x is successfully connected, then the network status will display as “registered”.
If not, please contact your Internet service provider for troubleshooting.
The LED indicator would also help to identify the network status: System:- Solid On: Equipment starts
- On for 500ms, off for 500ms: successfully connected
- On for 100ms, off for 100ms: failed to connect
Sometimes it happens when the network status displays as “registered” in Toolbox while the system LED indicator remaining on for 100ms and off for 100ms. Under this situation, the Milesight UC3x will fail to connect to the Internet, please contact your Internet service provider for troubleshooting.
 2.Create a Thing
Step 1: Log in to your AWS account. ( console.aws.amazon.com/iot)
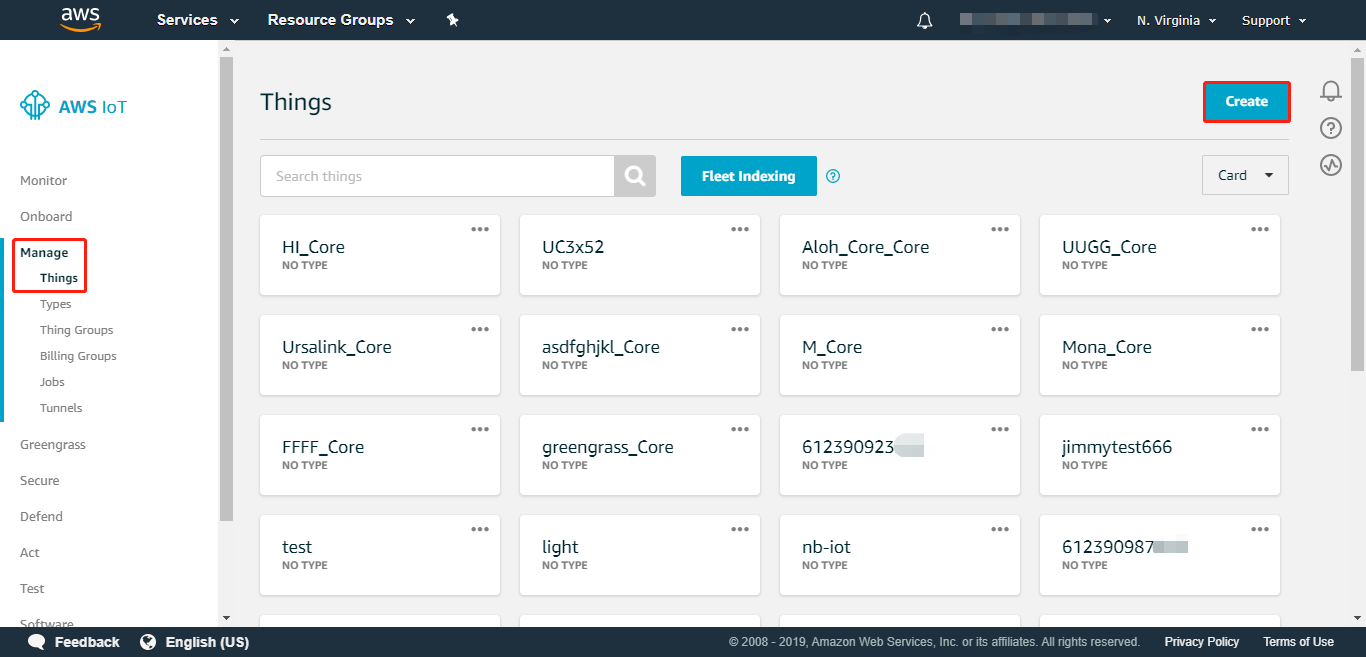
Step 2: Go to “Manage > Things” and click “Create” on the top right corner.
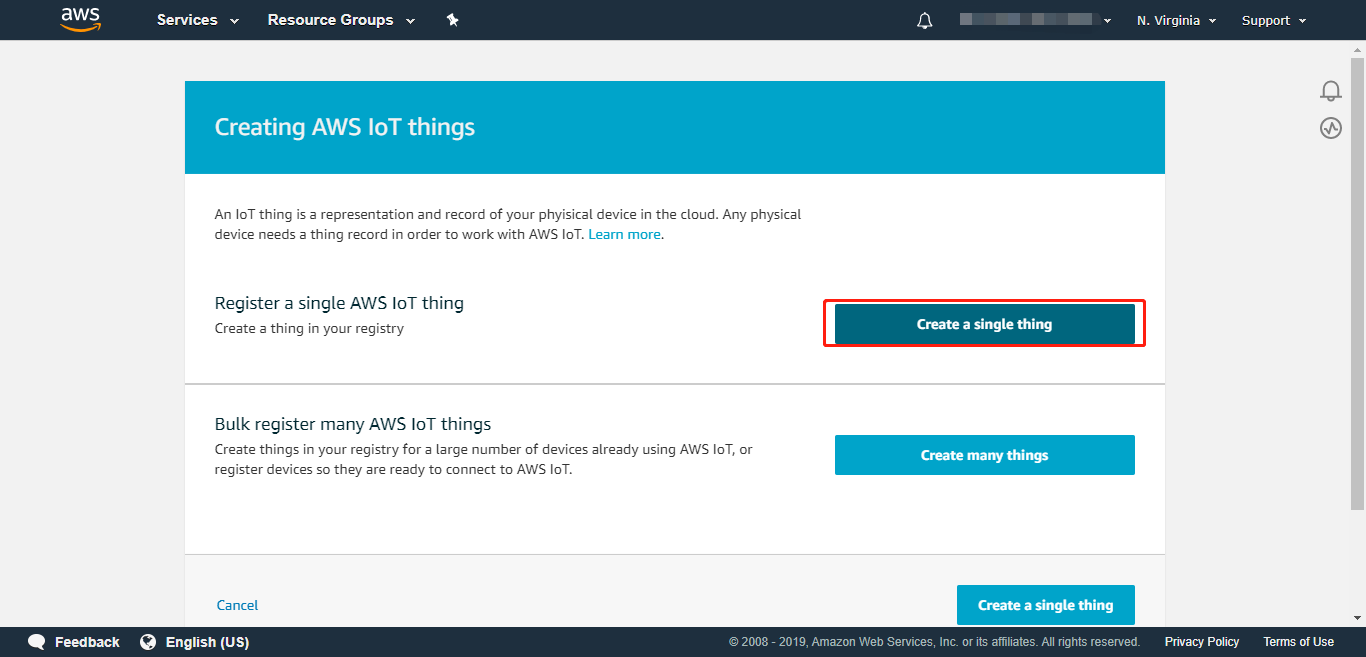
 Step 3: Click “Create a single thing”.
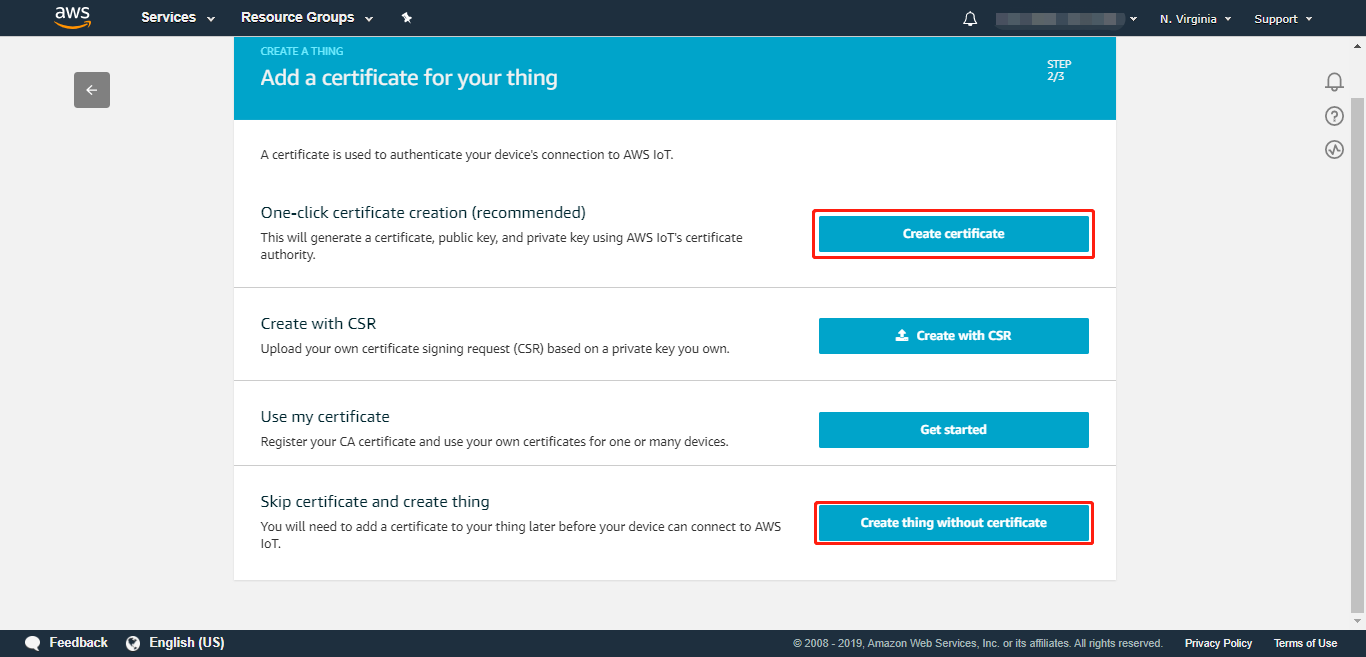
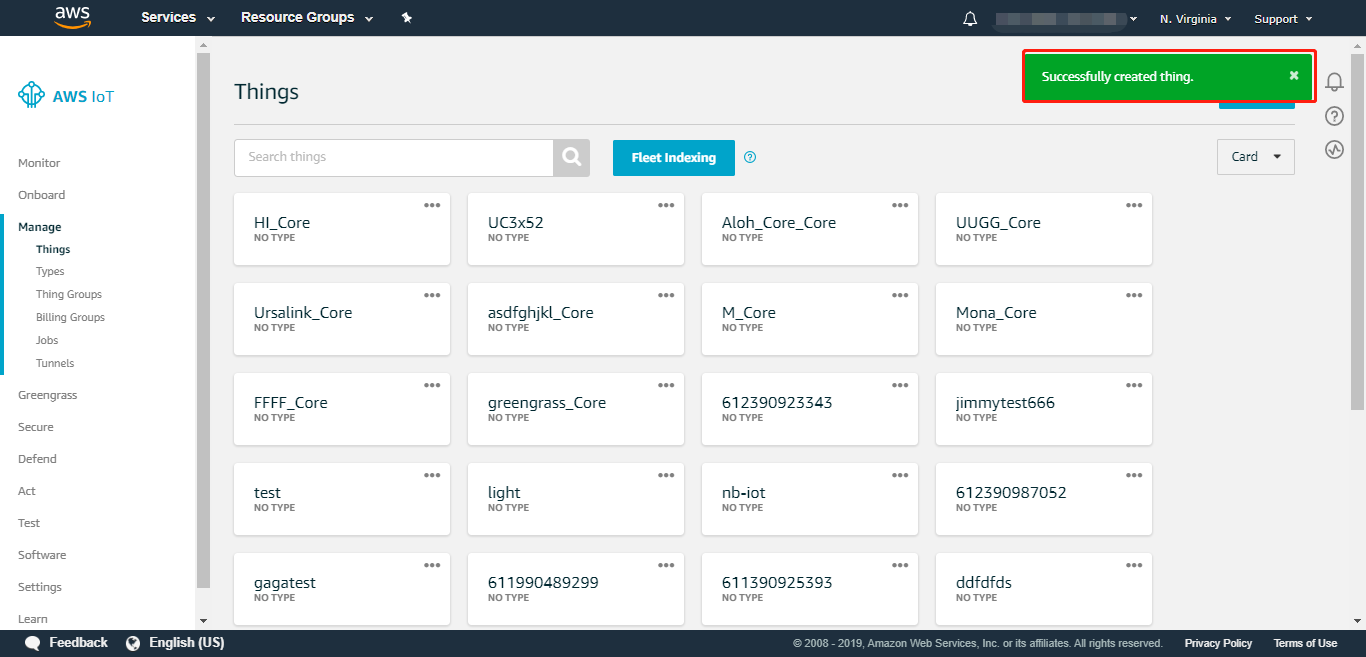
 Step 4: Name the thing. Select either “ Create certificate” or “Create thing without certificate”
Note:
If you choose “Create certificate”, you can skip Section 3 and go straight to Section 4.
 3.Create Certificates
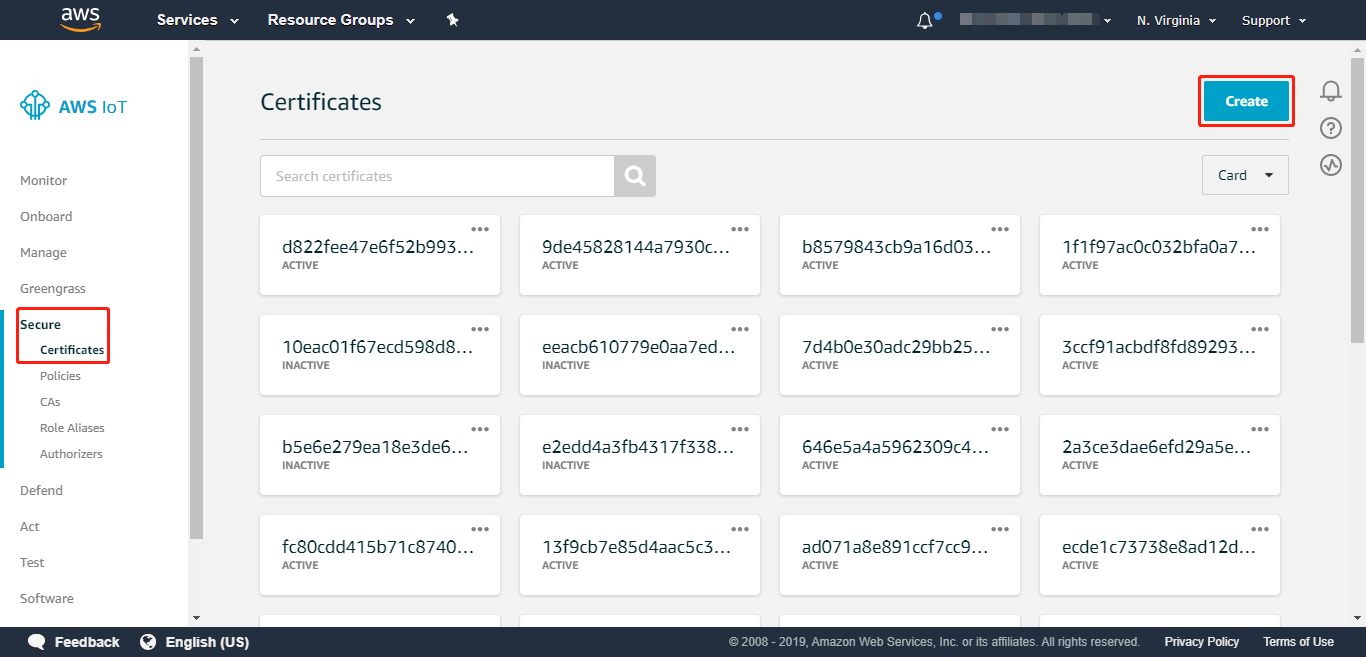
Step 1: Go to “Secure > Certificates” and click “Create” on the top right corner.
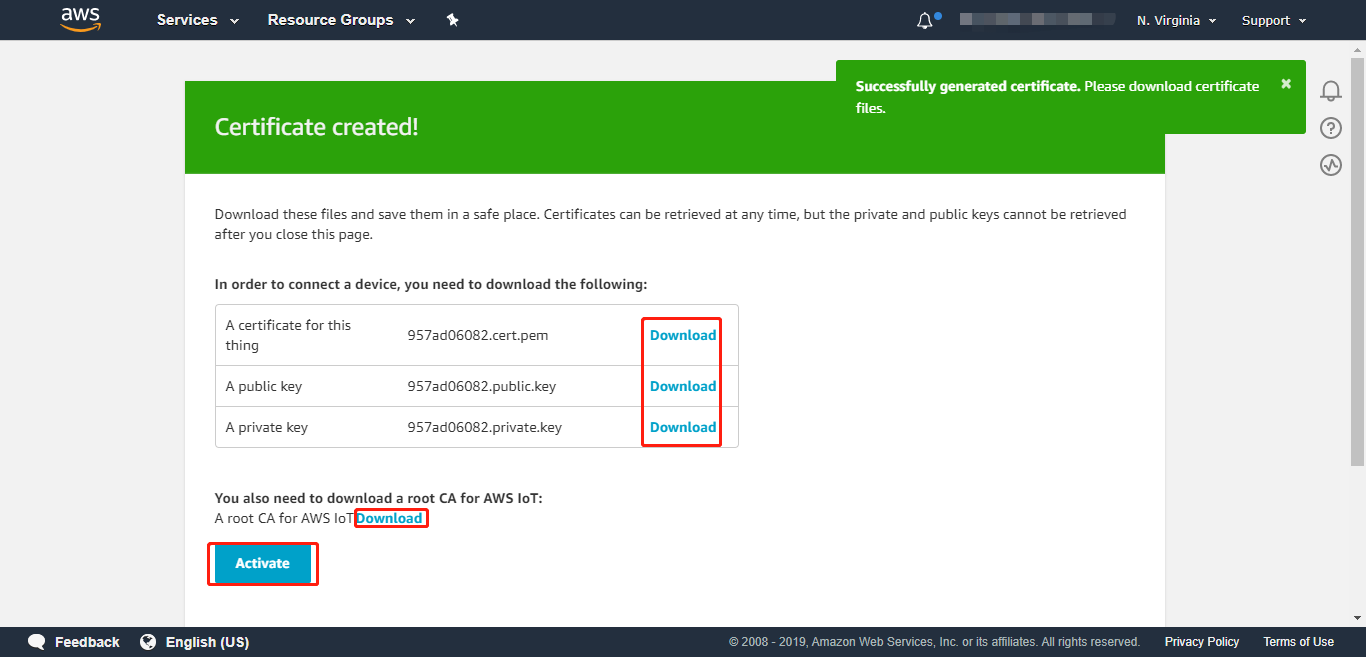
 Step 2: After certificates have been created,
①Click “Activate”
②Download “a certificate for this thing”, “a public key”, “a private key”
③Download a “root CA”.
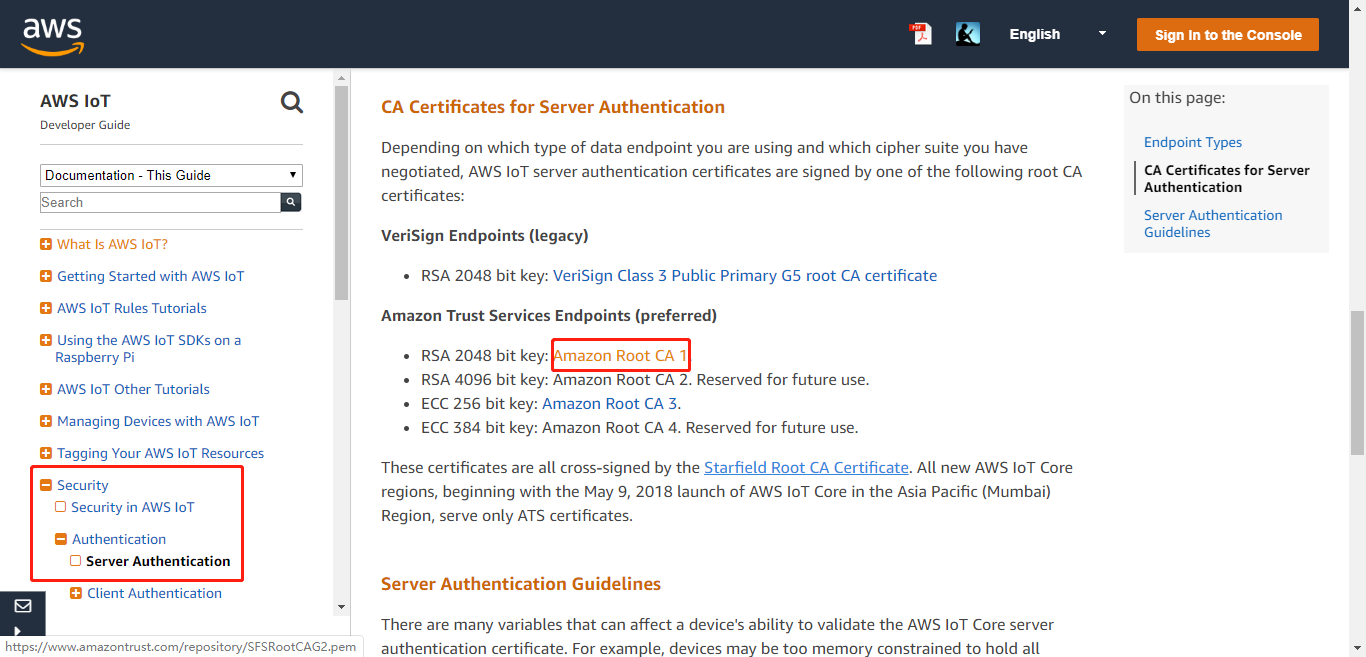
Step 3: After you download “root CA”, you will be lead to AWS IoT Developer Guide. Please find “Security > Authentication > Server Authentication” on the left. You should read through the guide. Then click “Amazon Root CA 1” and copy the code to create a ca.pem.
 Note:
Note:
CA certificates have an expiration date after which they cannot be used to validate a server's certificate. CA certificates may need to be replaced prior to their expiration date. You should update the root CA certificates on all of your devices to ensure ongoing connectivity and to keep up to date with security best practices.
With certificates files ready, we may move to the next step.
 4.Create Policy
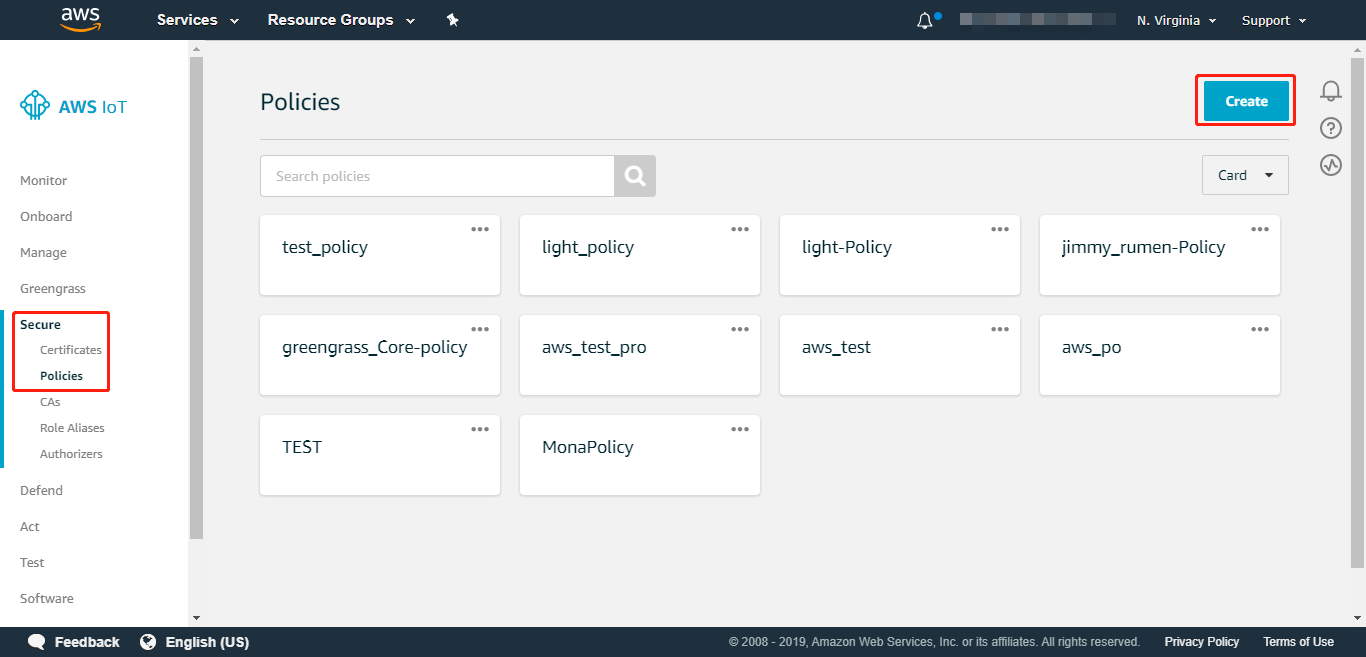
Step 1: In AWS IoT console, find “Secure > Policies” and click “Create” at the top right corner.
Step 2: Name the policy. Go through AWS IoT Policies before creating a policy, Add statements as shown below, we take“*” here as an example. Click “Create”.
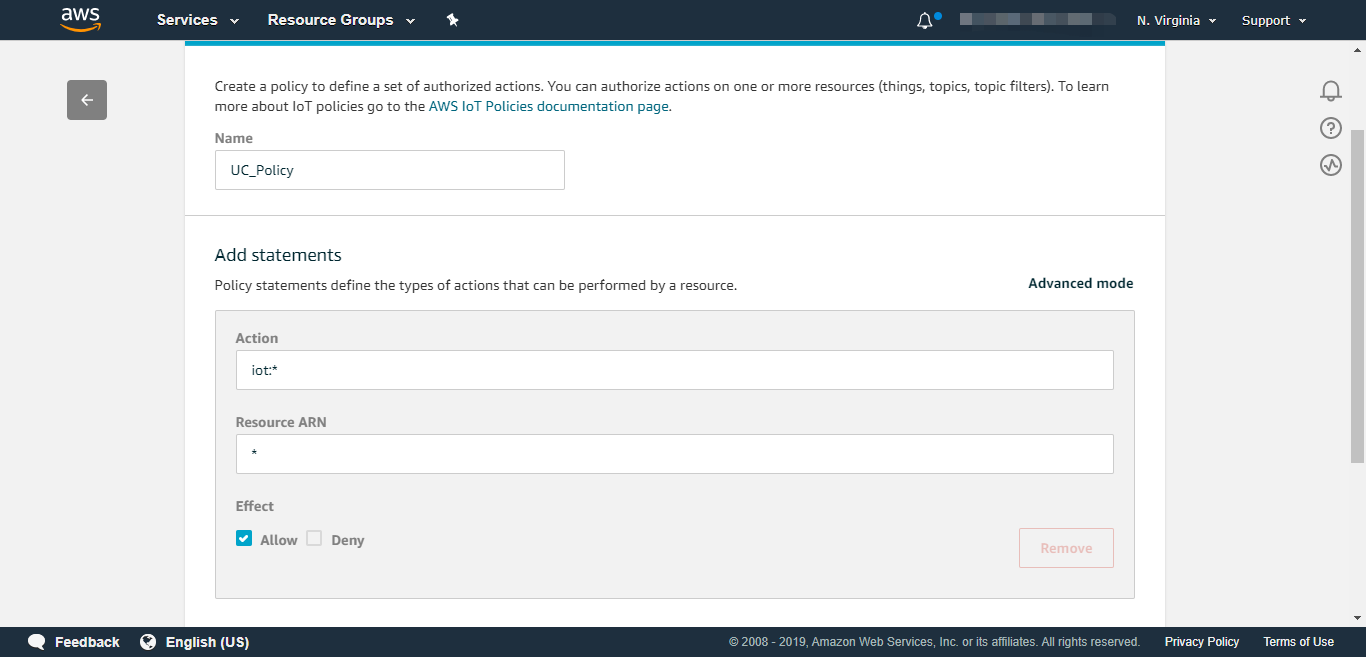
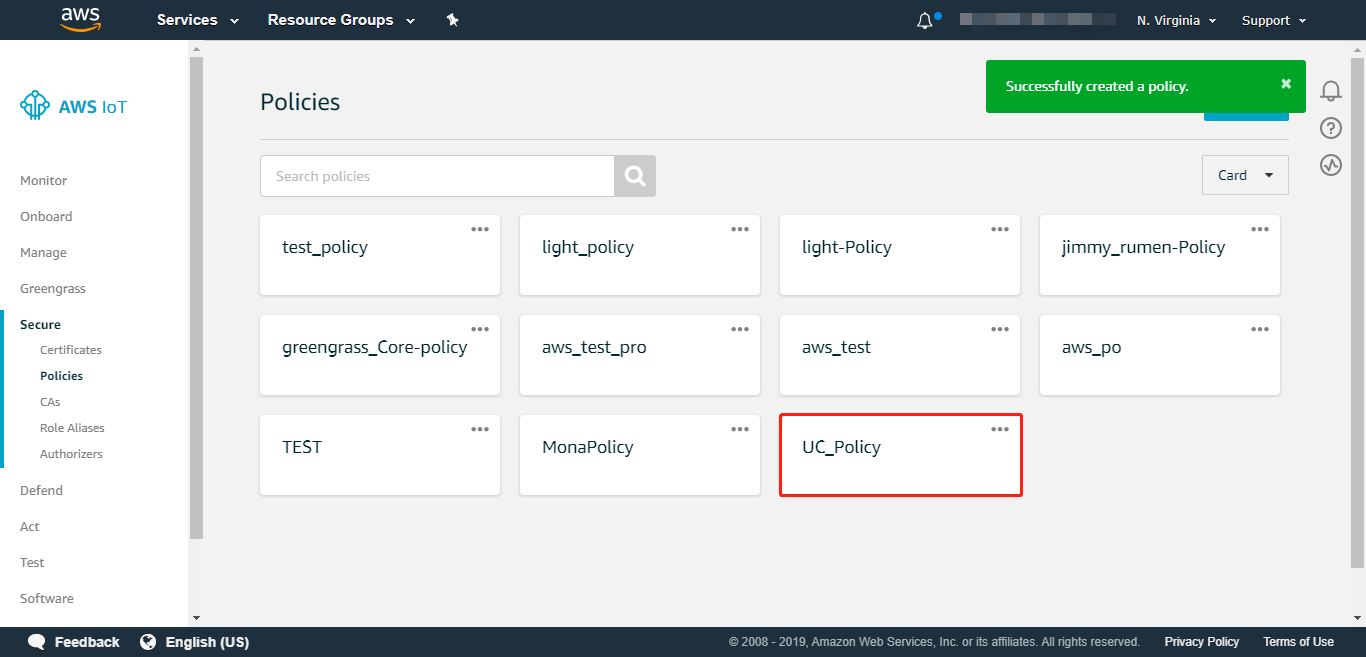 5.Attach Policy to Certificate
Step 1: Go to “Secure > Certificates”, click the three dots on the certificates we just created in Section 3 and find “Attach Policy”.
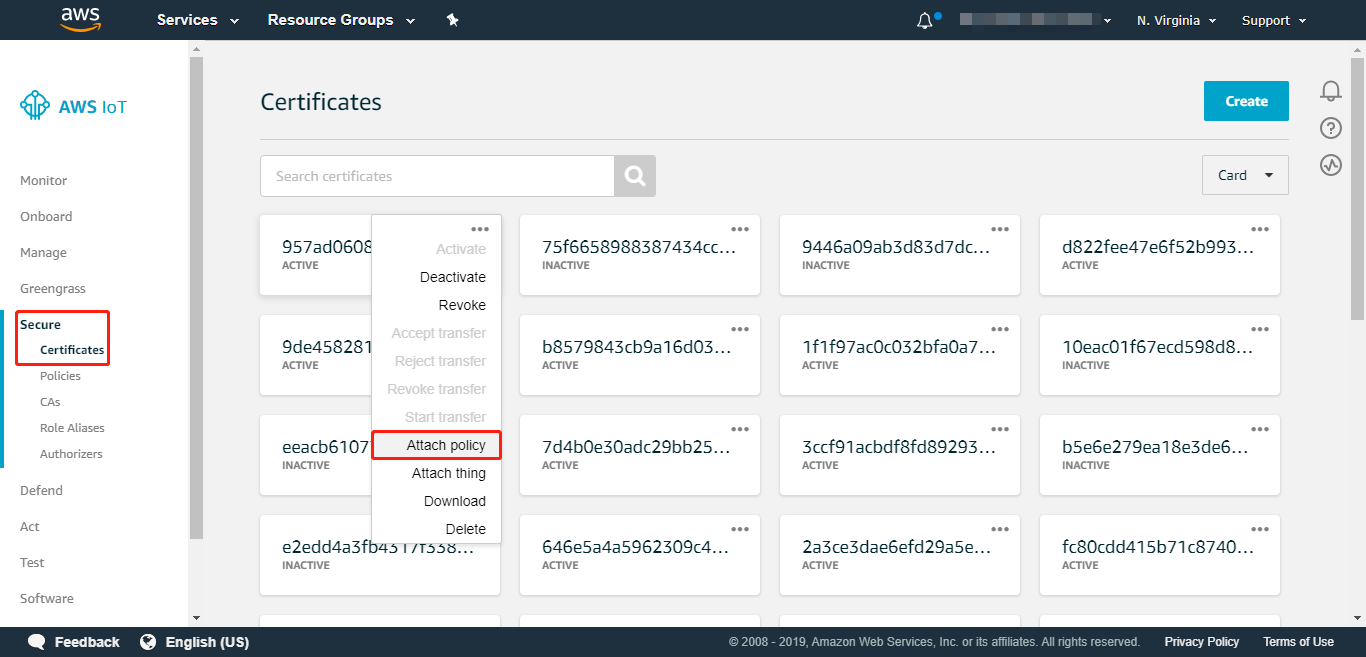 Step 2: Choose the policy we created in Section 4.
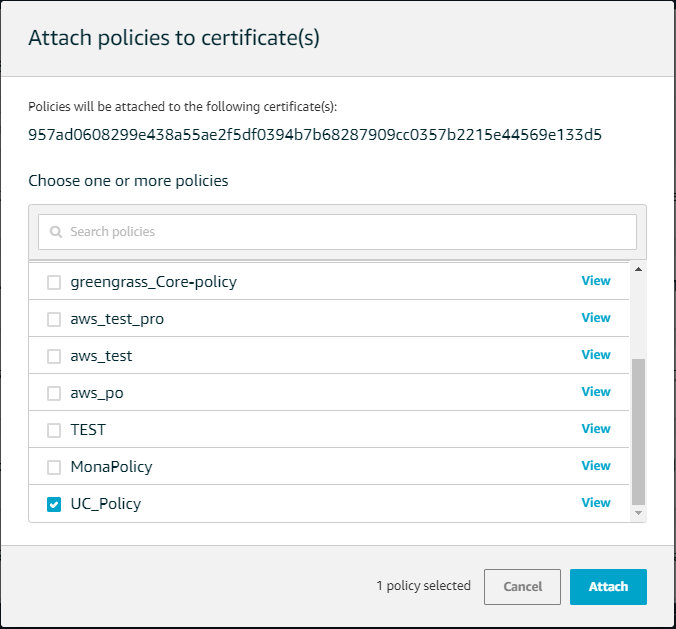 Note:
Note:
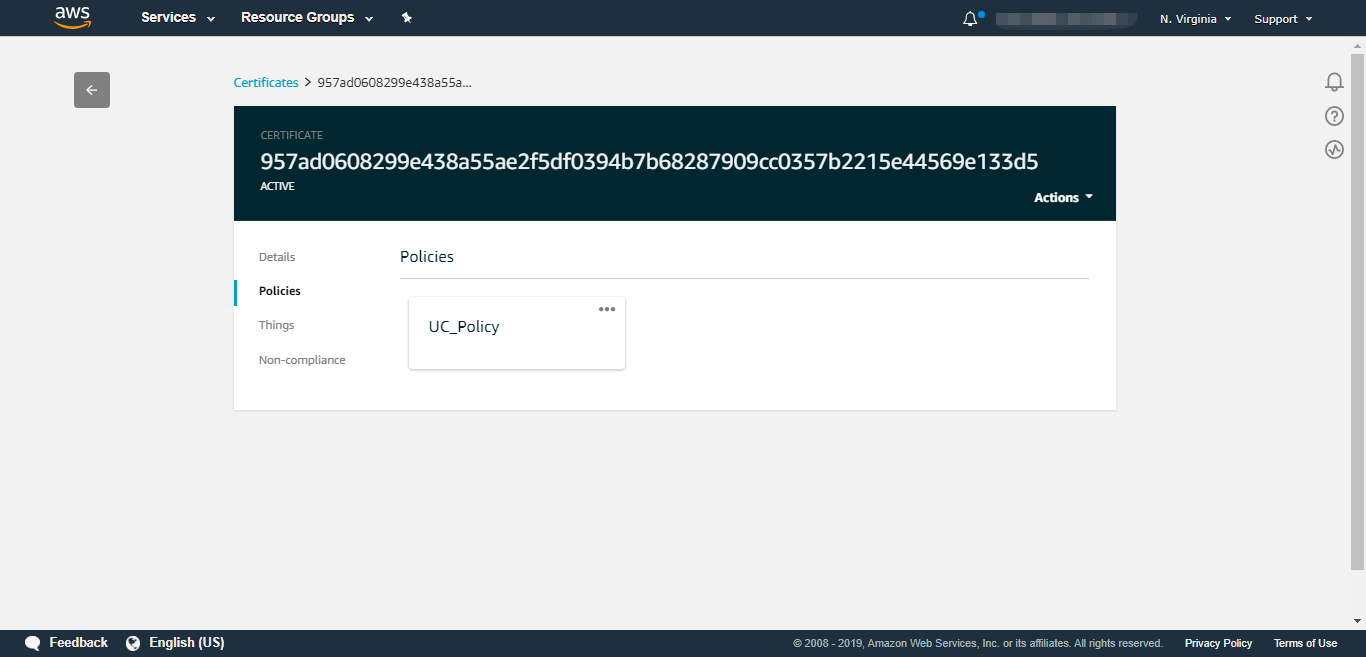
You may verify in details of certificates by clicking on the block as shown in step 1 of Section 5. If the policy is shown, then it means you successfully uploaded the attachment.
 6.Import Certificates to UC3x
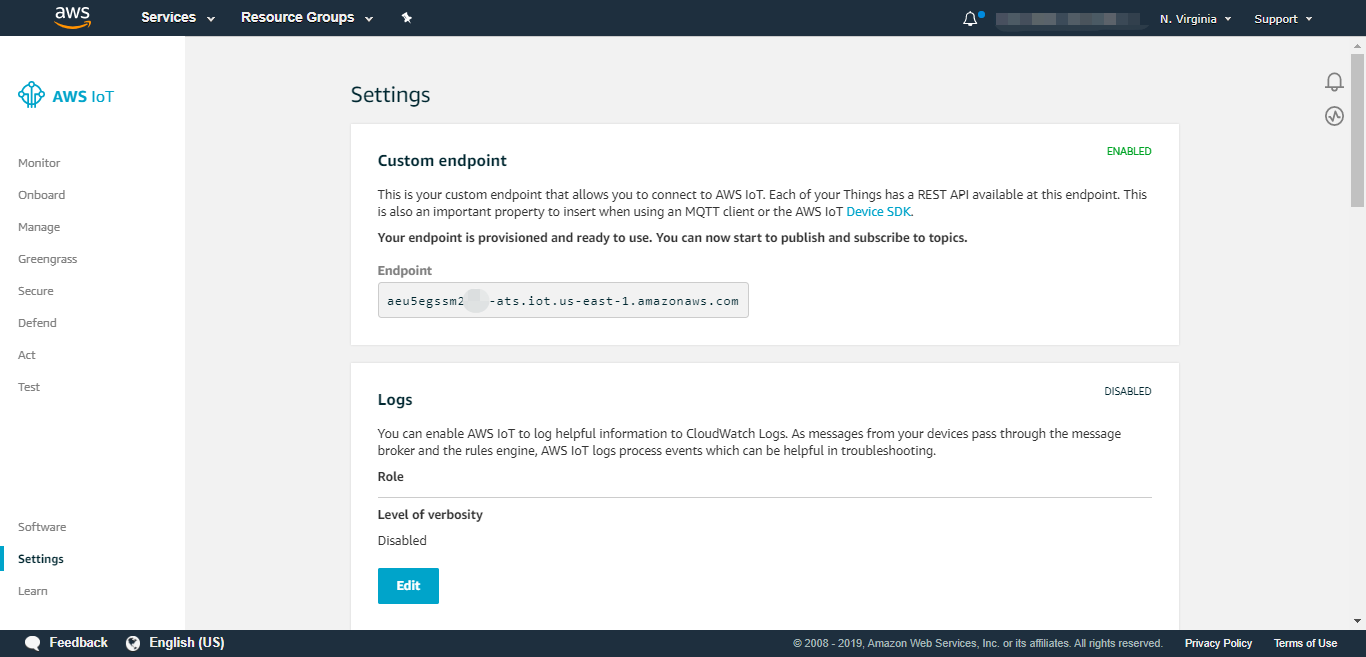
Step 1: Go to “Toolbox > General” and choose AWS as Application Mode. Switch back to “AWS web GUI >Settings” and fill in the server address of Toolbox at “Endpoint”.
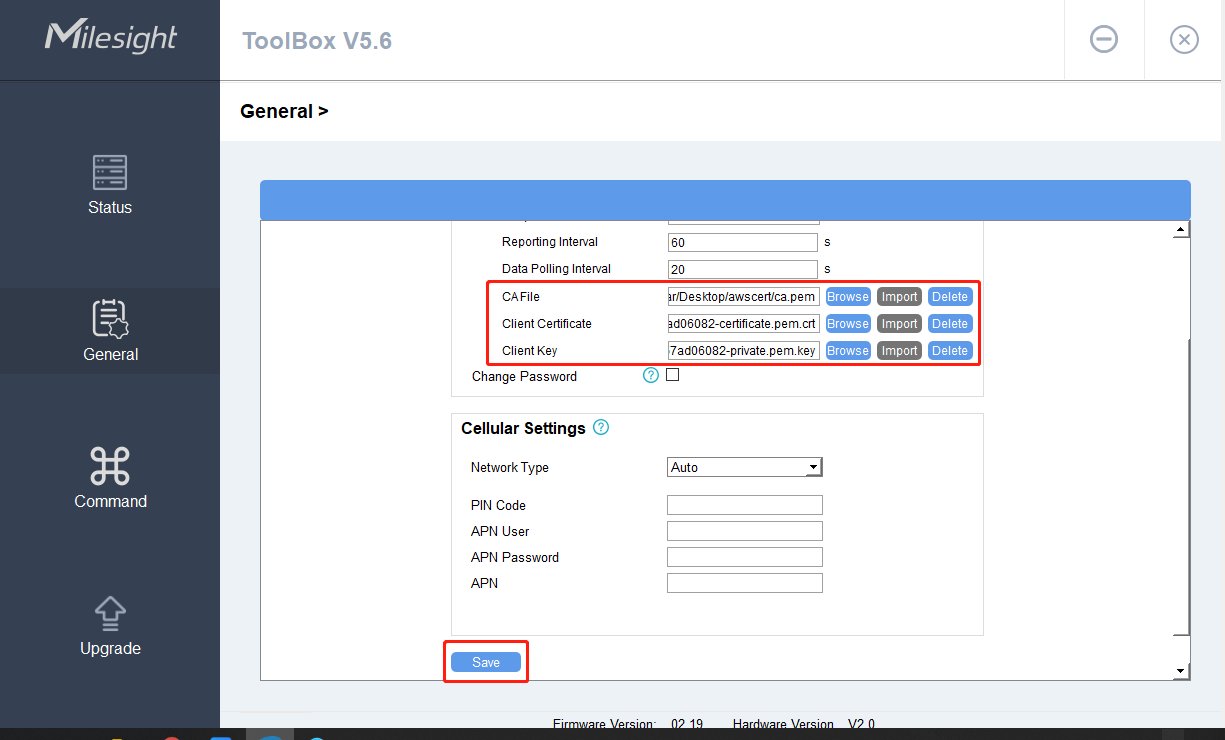
Step 2: Upload the files you downloaded in Section 3. Import “ca.pem” to “CA File”, “certificate for this thing” to “Client Certificate” and “private key” to “Client Key”. Click “Save” to make changes take effect.
 The UC3x is ready for MQTT communication.
7.Subscribe to Topic
Step 1: Go to AWS Web GUI and find “Test” on the left.
Note:
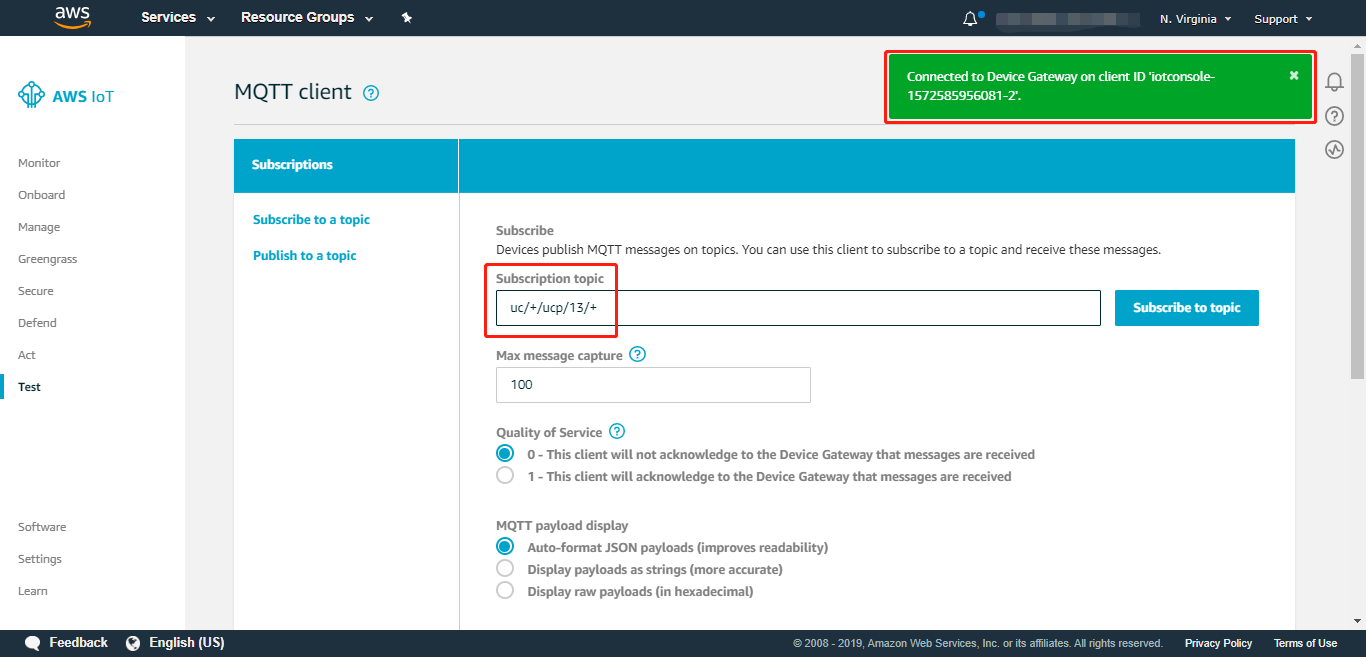
Green sign on the top right corner: UC3x is configured correctly and successfully connected.
Red sign on the top right corner: UC3x is not connected. MQTT connection error.
If something goes wrong, you can use serial debug software rather than Toolbox to check UC3x or contact Milesight technical support for help.
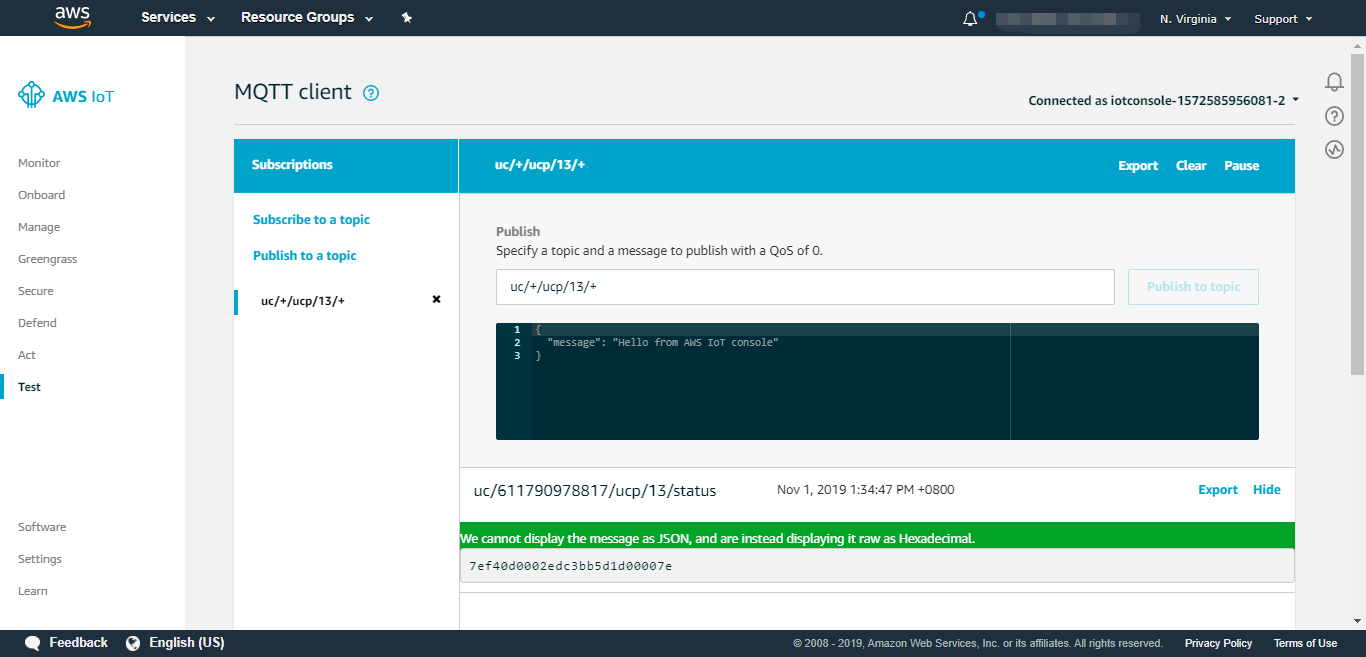
Step 2: Type in “uc/+/ucp/13/+” at “Subscription Topic”. Click “Subscribe to topic”. Note:The first “+” stands for the SN of UC3x. You can replace “+” with specific SN of UC3x if you wish to subscribe the device to the topic.
AWS supports two types of wildcard characters. You may find explanation by clicking the question mark logo.
 UC3x may start to communicate with AWS. Standard UC3x has four topics in its regular uplink:
uc/[SN]/ucp/13/dev
uc/[SN]/ucp/13/status
uc/[SN]/ucp/13/attr
uc/[SN]/ucp/13/cfg
Here is an example of uplink shown below. As for hexadecimal code in message, please refer to Payload Structure document or UCP Converter version 1.2.
 8.Publish to Topic
Step 1: Go to “Publish to a topic”. This function uses device shadow service that you can find on AWS IoT Developer Guide.
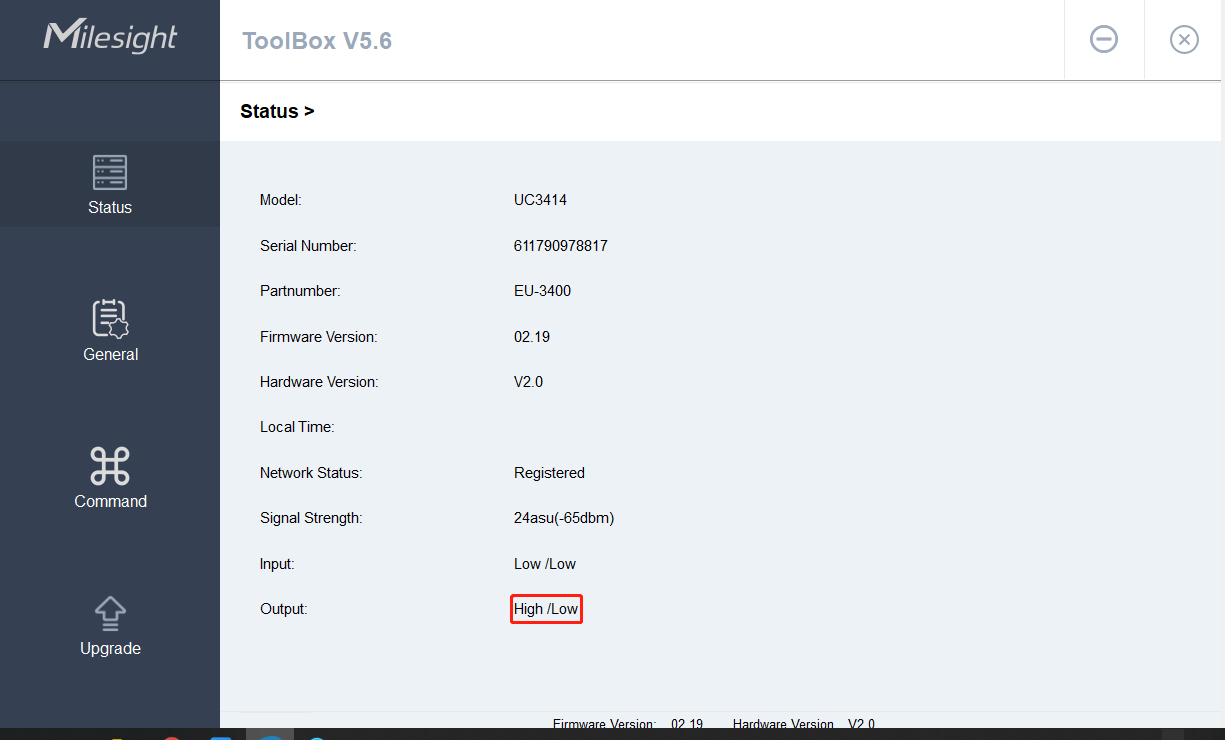
Link: https://docs.aws.amazon.com/iot/latest/developerguide/iot-device-shadows.html Step 2: We will use an example as how to control digital output of UC3x with topic and message as below. $aws/things/[SN]/shadow/update { "state":{ "reported":{ "dout1":"off" }, "desired":{ "dout1":"on" } } }When it is published, you will hear a click sound from UC3x relay, or you can find the output status has changed to High in “Toolbox > Status”.
